November 11, 2015 • Resources
A boat isn’t the easiest place from which to photograph wildlife. Not only are the animals moving, but so are you. Your mind is busy with your camera settings, anticipating behavior, tracking a subject, considering how your own often unpredictable movement factors in, and of course monitoring your body for motion sickness. It may sound a little overwhelming, but with a few tips and a little practice you can easily master photographing wildlife from a rocking boat.
A 500mm lens helped to capture this horned puffin up close. © Jaymi Heimbuch
1. Bring the right lens
Wildlife photographers are famous for coveting longer lenses because they get you closer to your subject. But a longer lens is more challenging to stabilize for sharp shots, and on a boat, stabilization is rocky at best. Unless you’re specifically shooting smaller wildlife such as sea birds that aren’t getting very close to the boat, a long lens can be problematic for getting a lock on your subject and maintaining focus, and also often proves to be too much lens.
That said, a long prime lens certainly has its benefits. While photographing horned puffins, harbor seals and sea otters from a boat in Alaska, a 500mm lens was my ideal tool. However, recently I went on a whale watching trip with a 500mm for birds, a 17-55mm for landscapes and dolphins playing at the bow of our boat, and a 70-200mm for everything in-between. Though each of the longer lenses came in handy at different times, a 100-400mm lens would have been easier to to use for the species we were focused on spotting. I probably would have been quite happy to leave the two longer lenses at home and just use one long zoom lens which would provide more flexibility in focal length, easier stabilization, and less gear to manage.
A harbor seal on the coast of Alaska, captured at 500mm. © Jaymi Heimbuch
Something like Canon’s 70-300mm or Sigma’s 120-300mm will let you adjust your focal length without needing to put on a different lens—and swapping out lenses is not something you want to spend time doing on a rocking boat with wind and sea spray all around you. Speaking of sea spray, include lens cleaner and microfiber cloths to help keep your lens spot-free.
A 17-55mm lens provided a wide field of view for capturing close subjects. © Jaymi Heimbuch
2. Slow down your tracking speed
One of the issues with shooting wildlife that is sitting on or gliding over the water is that the autofocus on your camera may get confused between tracking the movement of your subject and tracking the movement of the water surrounding it. You can help your camera out by making a quick adjustment in the menu.
When using continuous autofocus (AI-Servo for Canon users, AF-C for Nikon users), your camera tracks the movement of a subject so that it maintains focus even as a subject moves across the frame, closer to you, or farther from you. It is a commonly used tool for photographing wildlife, since your camera can keep a lock on any animal as it flies or runs. When there are various things in the frame moving, your camera can get confused and bounce back and forth between your moving subject and other moving objects, like leaves blowing in trees or, in our case, splashing water.
Adjusting your camera’s autofocus settings and tracking speed can help ensure sharp focus with moving subjects like this black-footed albatross. © Jaymi Heimbuch
You can adjust how sensitive your camera is to movement by adjusting the tracking speed in the menu options. The faster your tracking speed, the harder your camera looks for movement. The slower the speed, the lazier it is about switching subjects to lock onto. Ensure you keep a better lock on your subject, especially something like a bird sitting on or taking flight from the water, and avoid your camera accidentally focusing on the waves around the subject by going into your camera’s custom menu options and slowing down your tracking speed. This will help your camera to know that once it locks, it doesn’t need to look too hard for anything else and can reduce your odds of losing some great shots because your camera decided the waves were more interesting than the bird flapping across them.
3. Have good communication with the captain
Getting the shots you want means getting into a good position regarding the subject and the light. Check in with your captain as you begin your trip so you’re on the same page about getting into position with wildlife opportunities. The captain will be able to juggle issues from where the boat can and can’t go, including regarding legal proximity to wildlife, while also working to get you into the best position for photographs. The highly experienced captain also will have information like where the best position on the boat is for photographing certain species, tips on predicting behavior of different species for the best action shots, and is an extra set of eyes for spotting wildlife.
If you and the captain have great communication about what you’re hoping to photograph and how you might get your shots, then you will likely come home with a much better selection of images. So make friends the moment you step on the boat.
A black oystercatcher photographed from a boat. © Jaymi Heimbuch
4. Get a new handle on stability
You don’t need to worry about stability beyond keeping your arms steady when hand-holding your camera with both feet on solid ground. You can even reduce that shake by putting your camera on a tripod. On a boat, however, stability enters a new dimension of difficulty and tripods are out of the question. You need to worry about your arms shaking as well as keeping your balance as the boat rocks over the waves.
Common sense for not falling down on a boat is to have at least three points of contact, which is usually both feet and a hand grasping something. However, when shooting, your hands are full. So, take advantage of what’s around you to gain extra stability while you’re shooting, including leaning (carefully!) on the railing or kneeling on the deck. Keep your knees loose, so that you can compensate for rocking by shifting your weight quickly as needed.
Also, keep your mind on where you are, and remember that the movement of a boat can be unpredictable. Though it is easy to get absorbed in photographing the wildlife around you, it is important to always be aware of incoming waves and how they might rock the boat. This way you’re less likely to be caught off guard and miss your shot, or worse, take a tumble.
Brown pelicans. © Jaymi Heimbuch
5. Take a breather
Though it’s not a pleasant topic, we should address sea sickness. If you have a sensitive stomach, looking through the lens for long periods of time only makes motion sickness worse. So even if you’re feeling fine, remember to take breaks from shooting. Look out to the horizon or at the shoreline, take some deep breaths, and assess how you’re feeling.
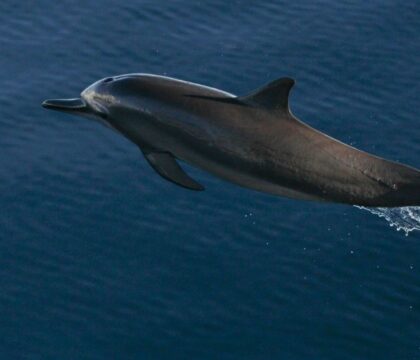
It’s so easy to get absorbed in photographing dolphins at the bow or birds feeding from a bait ball, and forget to check in with your body to see how you’re feeling. When you do finally put your camera down, it may be too late. The best cure for sea sickness is prevention so remember, take breaks and deep breaths often to avoid queasiness.
One last bonus tip: when putting down your gear, don’t forget you’re on a boat where things slide or tip overboard. Hang on to your gear, or put it down in a place you’re certain it won’t slip off the deck. Losing gear overboard is easier than you think!
A sea otter off the coast of Alaska. © Jaymi Heimbuch


